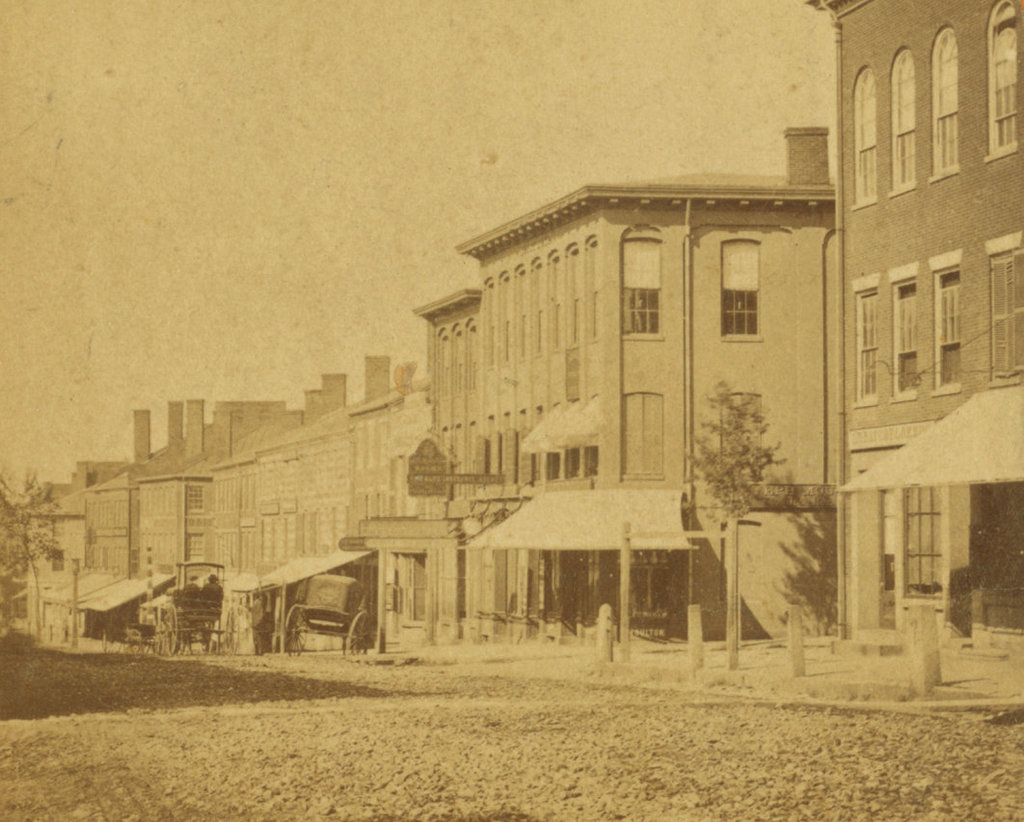
State Street, Newburyport, Massachusetts

The view looking north on State Street from the corner of Essex Street in Newburyport, around 1865-1885. Image courtesy of the New York Public Library.

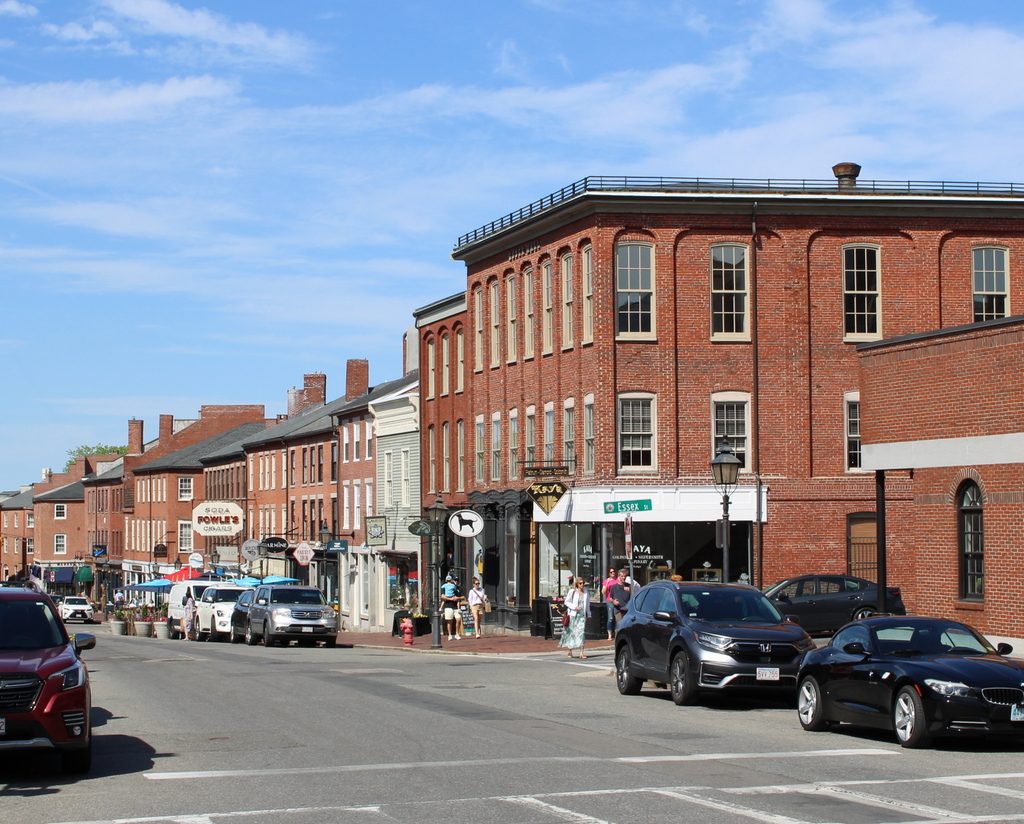
The scene in 2024:

Located at the mouth of the Merrimack River in the northeastern corner of Massachusetts, Newburyport was a major seaport during the 18th and early 19th centuries. During this time, it prospered from the shipping, fishing, and shipbuilding industries. These two photos show State Street facing toward Market Square in the distance. This was the commercial hub of Newburyport, and the streets around here are lined with brick, three-story commercial buildings that primarily date to the early 19th century. This area suffered a devastating fire in 1811, and many of the buildings that are shown in these photos were built in the immediate aftermath of the fire.

During the second half of the 19th century, Newburyport’s economic prosperity began to decline. Shipping became increasingly concentrated in larger northeastern ports like Boston and New York, although Newburyport continued to be an important shipbuilding center for many years. However, as ships grew larger, and as steamships began replacing sailing vessels, Newburyport’s small harbor became inadequate. For part of the 19th century, the textile industry provided a boost to the local economy, but the city could hardly compete with the much larger water-powered industrial cities farther upstream, such as Lawrence and Lowell.

By the time the top photo was taken, Newburyport’s population stood at about 13,000 people. This was a considerable increase from earlier in the 19th century, but the city would see only very modest growth in future decades. This stagnation was a result of the economic decline of the city, but it also had the unintended effect of preserving much of Newburyport in its early 19th century appearance, as shown in the comparison between these two photos, which has nearly all of the same buildings in both photos, despite the passage of around 140-150 years.

However, Newburyport’s well-preserved downtown area was nearly lost in the 1960s, when it was the subject of a large-scale urban renewal project that would have leveled the early 19th century commercial center in favor of strip malls and parking lots. Thankfully, preservation advocates were successful in having this project scrapped, and instead the State Street area was restored in the 1970s. As a result, Newburyport’s downtown area is now a strong asset to the city, and it survives as a remarkably well-preserved example of an early 19th century New England seaport.

Town Square, Plymouth, Massachusetts

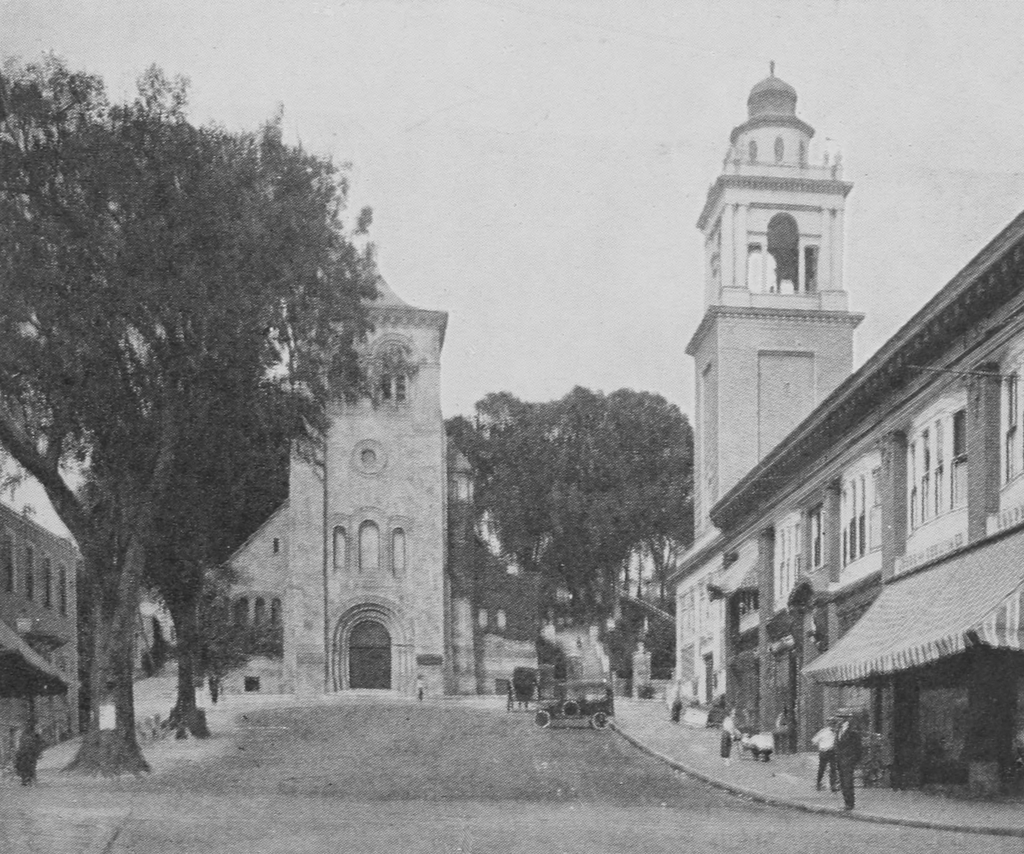
The Town Square in Plymouth, around 1865-1885. Image courtesy of the New York Public Library.

The scene around 1921. Image from Illustrated Guide to Historic Plymouth Massachusetts (1921).

The scene in 2023:

These three photos show the Town Square in Plymouth, facing west from the corner of Main and Leyden Streets. Since the early years of the Plymouth Colony, this site has been a focal point for the community, and it is surrounded by a number of historic buildings. Most significantly, the Town Square has been the site of a series of meetinghouses for the First Parish Church since the mid-1600s. However, the development around the square has also included town offices, the county courthouse, and various commercial properties over the years.

In the distance on the right side of these photos is Burial Hill. It was used as the town’s primary graveyard for much of the colonial period, but prior to that it was the location of several defensive fortifications, the first of which was built in 1621. The fort on the hill also served as the town meeting house until a purpose-build meeting house was constructed here at the square, which apparently occurred in either 1637 or 1648. It was located on the north side of the square, so it would have stood somewhere on the right side of the scene in these photos.

The 1637-48 meeting house was replaced by a second one in 1683, which stood at the west end of the square, on the site now occupied by the stone church in the center of this scene. A third meeting house was built on the site in 1744, followed by a wooden Gothic Revival church in 1831. That building is shown in the center of the top photo, and it stood here until 1892, when it was destroyed by a fire. This fire prompted the construction of the current First Parish Church of Plymouth on the same site. This Romanesque Revival church was completed in 1899, and it bears resemblance to the style of church buildings that the Mayflower Pilgrims would have known in England prior to their departure for the New World.

Although the First Parish Church was the predominant church congregation throughout the colonial period in Plymouth, other churches would eventually emerge in the town, including the Third Church of Christ in Plymouth. Established in 1801 as a result of the Unitarian-Trinitarian divide that swept through New England churches in the early 19th century, this congregation continued to follow the more conservative Trinitarian theology and practices, while the First Parish Church became Unitarian. In 1840, the Third Church of Christ built the church that stands on the right side of this scene, and that same year it became known as the Church of the Pilgrimage.

Aside from religious organizations, the Town Square was also the seat of the colony’s government for many years. At some point in the 1600s, the colony constructed a “country house” on the south side of the square, in the distance on the left side of the scene. When this was built, Plymouth was still a separate colony, so the building served as the de facto colonial capitol. It was also used as a courthouse, and this continued even after Plymouth became a part of the Massachusetts Bay Colony in 1691. This building was eventually demolished and replaced by a new courthouse on the same site in 1749. The new building was also used for the town offices, and it still stands today. It is two stories tall and painted white, and it is visible in the distance on the left side of the bottom photo.

The area around the Town Square has also been the site of various commercial buildings over the years, particularly in the area closer to the foreground. All of the buildings in the foreground of the top photo appear to have been demolished by the time the middle photo was taken in the early 1920s, but their replacements are still standing here today. They include the Odd Fellows Block on the right, which was built in 1887, and another brick commercial building on the left, which was built around 1912.

Eagle Hotel, Concord, New Hampshire (2)

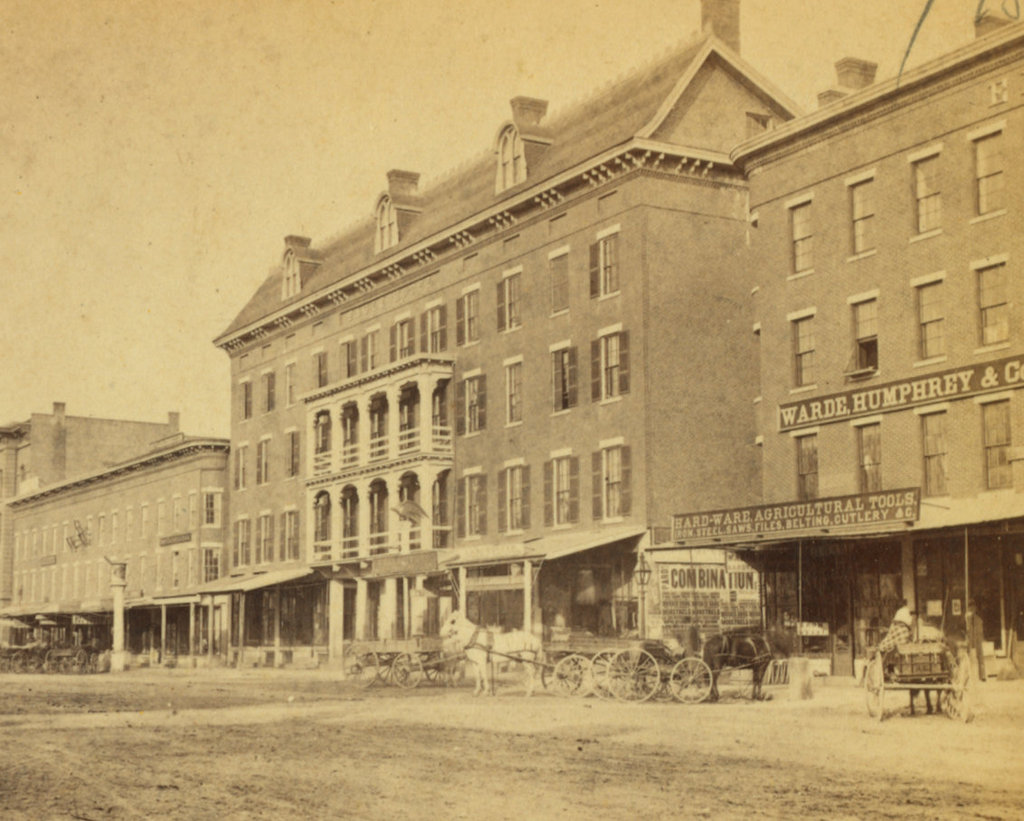
The Eagle Hotel on North Main Street in Concord, around the 1860s-1880s. Image courtesy of the New York Public Library.

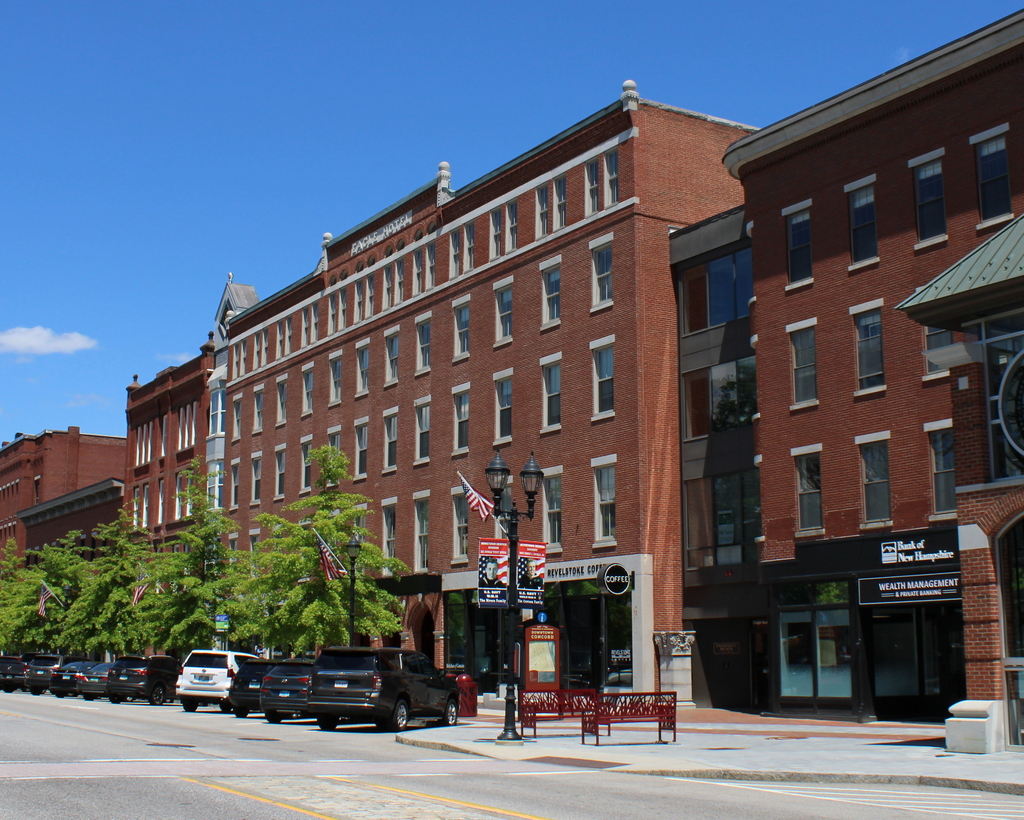
The scene in 2022:

As explained in more detail in the previous post, the Eagle Hotel was the leading hotel in Concord during the 19th century. It opened in 1852 on the site of the earlier Eagle Coffee House, which had burned in 1851, and it remained in business for over a hundred years. Because of its location across the street from the State House, it played an important role in state politics. Many legislators stayed here when the General Court was in session, and politicians would often gather here for meetings.

Several presidents visited the hotel, including Concord resident Franklin Pierce, who lived in the hotel for several months between his election to the presidency and his inauguration in Washington. Presidents Rutherford B. Hayes and Benjamin Harrison also stopped at the hotel during visits to Concord, as did Richard Nixon on two occasions in 1954 and 1959, when he was serving as vice president.

The first photo was probably taken in either the 1860s or 1870s, and it shows the original exterior appearance of the hotel. However, the building underwent major changes in 1890. It included interior renovations, such as the installation of an elevator and a central heating plant, and it also included exterior work. The original gable roof was removed, and it was replaced by a fifth story with a flat roof. The porches on the front of the building were also removed at some point during the 19th century, although this apparently happened before the roof, because there are other photos that show the building with no porches but with the original roof.

The hotel ultimately closed in 1961, but it is still standing as one of a number of historic 19th century commercial buildings here on North Main Street. Other surviving buildings in this scene include Stickney’s Old Block at 120-132 North Main Street. This was built in 1851, replacing an earlier building that had been destroyed in the same fire as the Eagle Coffee House. A portion of the building closest to the Eagle Hotel was demolished in 1885 to build the existing New Hampshire Savings Bank building, but aside from this the remaining sections of the older building are still standing. On the other side of the Eagle Hotel is the Merchants Exchange Block, which was also built after the 1851 fire. As was the case with Stickney’s Old Block, a portion of it was later demolished, but the part visible in this scene is still here. All of these buildings, including the Eagle Hotel, are now part of the Downtown Concord Historic District, which was added to the National Register in 2000.

Seamen’s Bethel, New Bedford, Massachusetts

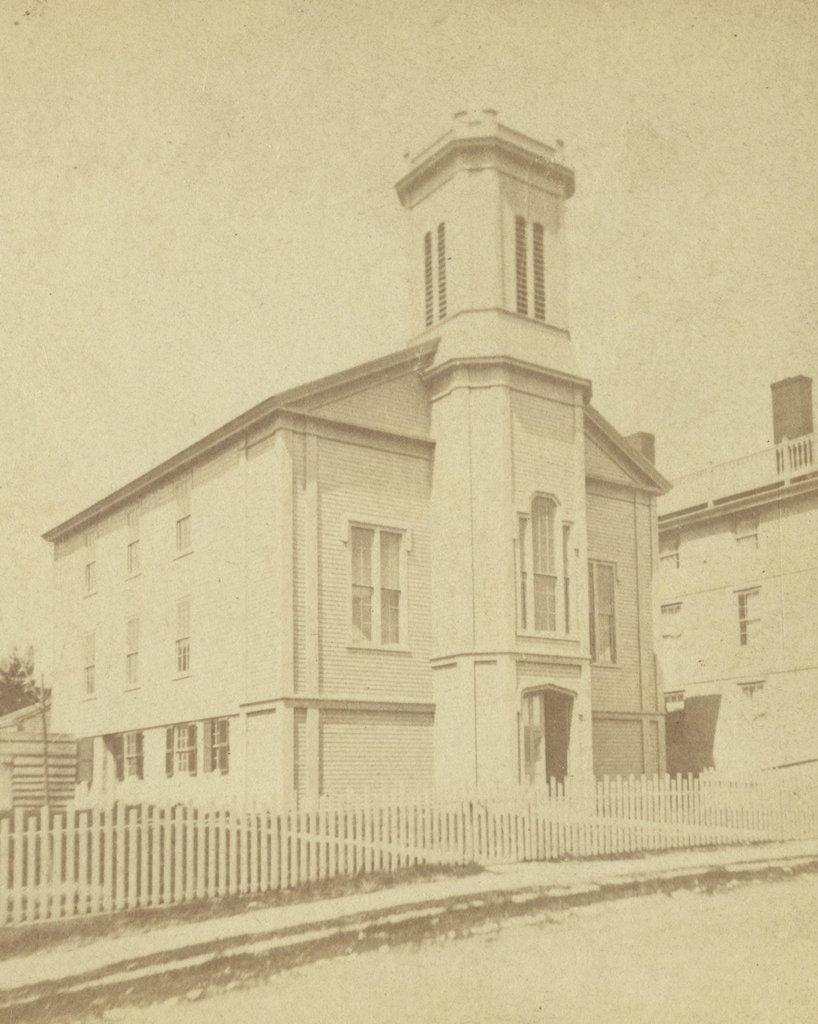
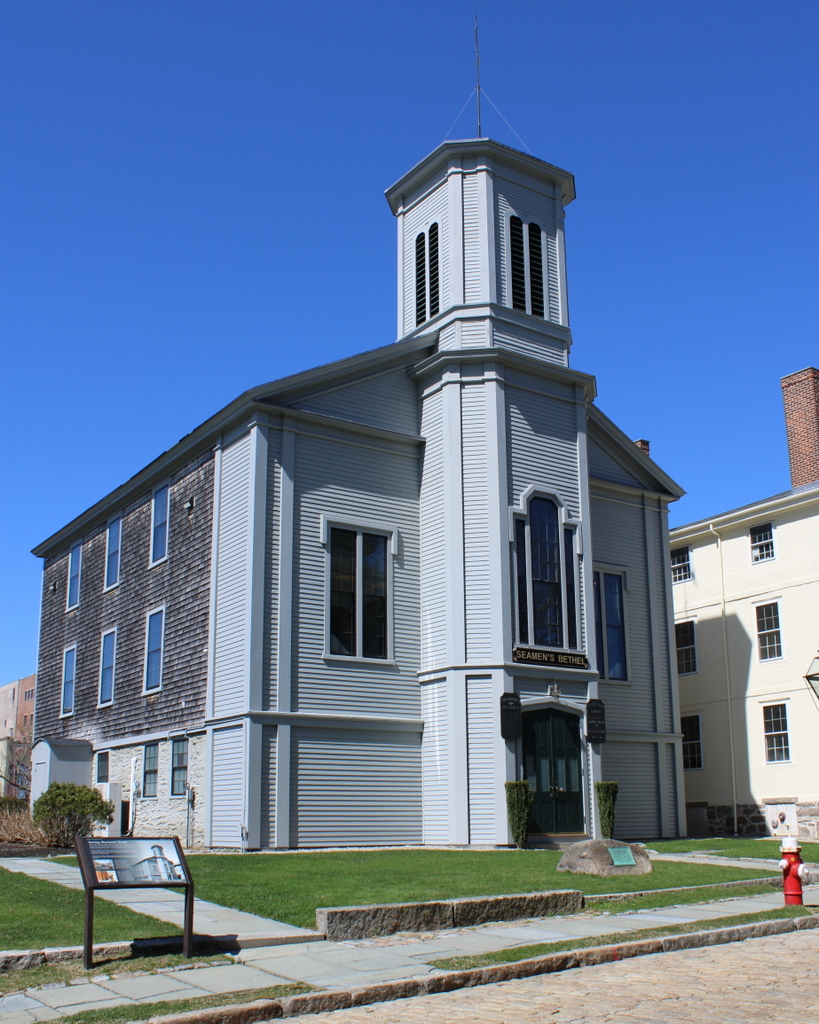
The Seamen’s Bethel on Johnny Cake Hill in New Bedford, around the 1860s-1880s. Image courtesy of the New Bedford Free Public Library.

The scene in 2022:

These two photos show the Seamen’s Bethel, perhaps the most famous whaling landmark in New Bedford. Its fame is derived largely from Herman Melville’s description of it in Moby Dick, but it also played an important role in the New Bedford whaling community. During much of the early 19th century, New Bedford was the world’s leading whaling port. From here, ships would embark on multi-year voyages around the world, and would—hopefully—return with their cargo holds filled with whale oil, spermaceti, and whalebone.

Whaling was inherently dangerous, not only because of the risks associated with long sea voyages in general, but also because of the dangers involved in trying to kill whales from small, easily swamped boats in the middle of the ocean. Crews were often a diverse mix of different ethnicities and nationalities, including former slaves who saw whaling not only as a means of employment, but also as a way to avoid recapture by their enslavers.

However, as was the case in any major port city, there were many in New Bedford who were concerned about how these whaling crews spent their leisure time when they were ashore. Sailors were typically paid a certain percentage of the profits at the end of the voyage, which meant that they returned to New Bedford flush with cash. And, after several years at sea, many sailors saw the city’s saloons, brothels, and gambling houses as ideal places to spend that hard-earned money.

In an effort to combat these vices, some residents took to vigilante action and occasionally destroyed notorious brothels. Others, however, took a more proactive approach, establishing the New Bedford Port Society for the Moral Improvement of Seamen in 1830. Two years later, in 1832, the organization constructed the Seamen’s Bethel on Johnny Cake Hill, which is shown here in these two photos. The goal was to provide a nondenominational chapel that would welcome a diverse population of sailors and meet their spiritual needs.

The building was dedicated on May 2, 1832, with a ceremony led by the Reverend Edward Taylor of the Seamen’s Bethel in Boston. A former sailor with little formal education, Taylor was nonetheless a popular preacher who was known for his engaging and colorful sermons. His ministry in Boston focused primarily on sailors, but he was also highly regarded by the literary elite of the 19th century, including those who tended to take a dim view on organized religion, such as Charles Dickens, Ralph Waldo Emerson, and Walt Whitman.

The first chaplain here at the Seamen’s Bethel in New Bedford was the Reverend Enoch Mudge. He was a Methodist minister, but in keeping with the nondenominational goals of the organization, he respected the various beliefs of the sailors of New Bedford. Among the sailors who heard him preach here was 21-year-old Herman Melville, who attended Sunday services on December 27, 1840, a week before he departed on the whaling ship Acushnet. He would spend the next few years at sea, and his experiences as a crewman on a whaling ship would help form the basis for his famous novel Moby-Dick, which was published in 1851.

The Seamen’s Bethel features prominently in the beginning of Moby-Dick, and it is the subject of chapters seven through nine, which are titled “The Chapel,” “The Pulpit,” and “The Sermon.” At the beginning of chapter seven, the narrator Ishmael enters the building on a stormy winter day, and provides the following description of the Bethel:

In this same New Bedford there stands a Whaleman’s Chapel, and few are the moody fishermen, shortly bound for the Indian Ocean or Pacific, who fail to make a Sunday visit to the spot. I am sure that I did not.

Ishmael goes on to describe the interior, including the marble monuments to various New Bedford sailors who were lost at sea. Such monuments do in fact exist here at the Seamen’s Bethel, but other interior features were completely fictional, including a pulpit that was shaped like the bow of a ship. Ishmael then describes Father Mapple, the fictional chaplain of the Bethel. His character is often considered to be based on Edward Taylor, but it also seems plausible that Melville based at least some of it on Enoch Mudge and the sermon that he heard here in 1840.

Over the years, the Port Society expanded its activities beyond just the Seamen’s Bethel. In 1851, Sarah Rotch Arnold donated her late father’s house to the society. It was then moved to the lot directly to the left of the Bethel, as shown in these two photos. It became the Mariners’ Home, a boarding house that offered accommodations to sailors. It was run by the Ladies Branch of the Port Society, and it provided an alternative to the city’s less reputable boarding houses, which were often located alongside the saloons and brothels in the red light districts.

The Bethel sustained significant damage in a fire in 1866, but it was subsequently repaired, and the first photo was likely taken at some point afterwards. It would continue to serve the spiritual needs of sailors for many years, but the decline in the New Bedford whaling industry helped to shift the society’s focus to some extent. As noted in the 1918 History of New Bedford, “[w]ith the decline of New Bedford as a port of entry, the society became more general in its character as mission, as at present.”

In the meantime, the popularity of Moby-Dick helped to draw attention to the Seamen’s Bethel, and over the years it became a major New Bedford landmark, especially after the 1956 film adaptation of the novel. So famous was Melville’s description of the chapel that, in 1961, the Port Society even altered the interior to make it conform with the novel by installing a bow-shaped pulpit. This wasn’t necessarily the best move from a historic preservation perspective, but it is certainly an example of the concept of life imitating art.

Today, very little has changed here in this scene. The Port Society is still an active organization, and still owns both the Seamen’s Bethel and the adjacent Mariners’ Home. Both buildings are well preserved overall, and they are located within the New Bedford Whaling National Historical Park, where they stand as reminders of the city’s heyday as a whaling port.

Burnside Bridge, Sharpsburg, Maryland (2)

The view of the north side of the Burnside Bridge, from the west bank of Antietam Creek, in September 1862. Photographed by Alexander Gardner. Image courtesy of the Library of Congress, Civil War Glass Negatives and Related Prints collection.

The scene in 2021:

As explained in more detail in the previous post, the Burnside Bridge—or lower bridge, as it had previously been known—was the focal point of the later phase of the Battle of Antietam on September 17, 1862. Ahead of the battle, the Confederates under Robert E. Lee had taken a defensive position near the town of Sharpsburg, with a line of soldiers that extended north to south. The southern end of his line was anchored on the heights just to the west of this bridge, and this led to intense fighting for control over the bridge.

Opposing the Confederates in the vicinity of the bridge was General Ambrose Burnside, whose IX Corps was positioned to the east of here, in the distance on the left side of this scene. However, because of poor coordination on the part of the Union commander, General George B. McClellan, Burnside received no orders until around 10:00 a.m., long after the fighting had begun on the northern part of the battlefield.

Despite the bridge being defended by only 500 Confederate soldiers, it took Burnside’s 4,000-man corps several hours to take the bridge, suffering about 500 casualties in the process. The Union forces finally took the bridge around 1:00 p.m., but Burnside delayed in moving his men, and they did not all cross until around 3:00 p.m. This gave the Confederates time to gather reinforcements, and rather than striking a decisive blow at the Confederate line, Burnside’s soldiers were faced with fresh Confederate soldiers commanded by A. P. Hill. The final portion of the battle occurred on the heights to the west of the bridge, to the right of where these photos were taken, and it was largely inconclusive, with Burnside’s soldiers managing to hold the bridge but unable to gain much ground.

The bridge came to be known as Burnside Bridge in his honor, although his actions here did face criticism. Some criticized his delays in moving his corps over the bridge, while others questioned whether the Union could have simply waded across the shallow creek, rather than making a costly and time-consuming effort to seize the bridge. Nonetheless, he was subsequently promoted to command of the Army of the Potomac in November, but he was ultimately dismissed after the disastrous Battle of Fredericksburg, which likewise involved a time-consuming crossing of a waterway.

The first photo was taken only days after the battle, by prominent Civil War photographer Alexander Gardner. Today, not much has changed here in this scene. The bridge is still standing, as is one of the trees from the first photo. Barely noticeable on the far left side of the first photo is a small sycamore tree, which now towers over the bridge in the present-day scene. It is the most famous “witness tree” at Antietam, and both the tree and the bridge itself are major landmarks here at the Antietam National Battlefield.

Burnside Bridge, Sharpsburg, Maryland

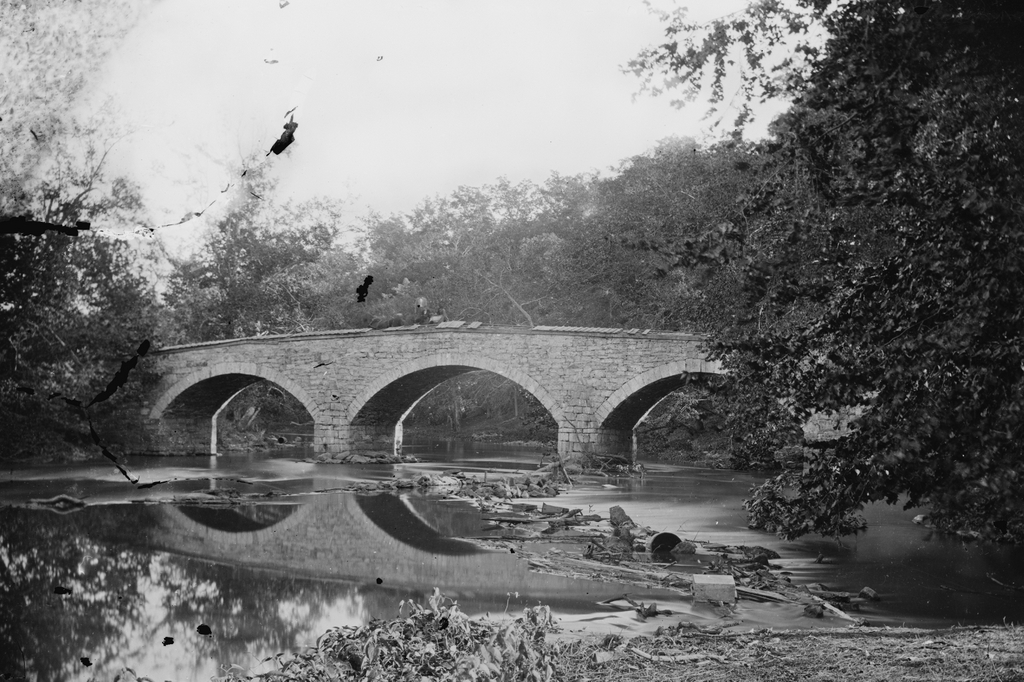
The view looking west toward the Burnside Bridge over Antietam Creek in Sharpsburg, Maryland, in September 1862. Photographed by Alexander Gardner. Image courtesy of the Library of Congress, Civil War Glass Negatives and Related Prints collection.

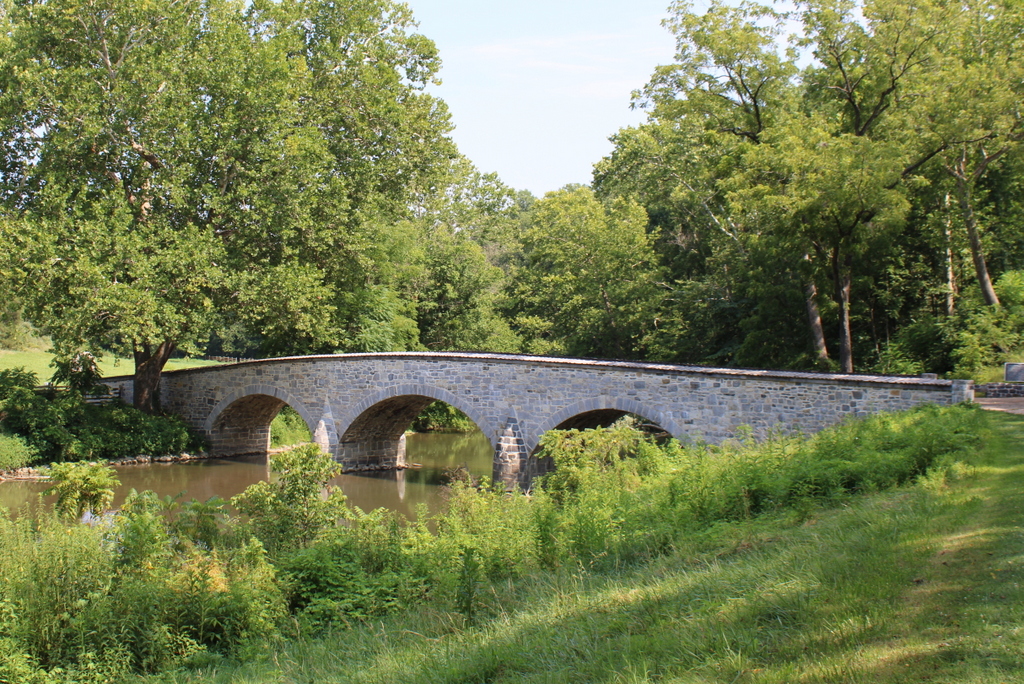
The scene in 2021:

The previous posts have featured some of the most distinctive landmarks on the Antietam battlefield, including the Dunker Church and the Bloody Lane. However, probably the single most iconic landmark at Antietam is this stone arch bridge, which came to be known as Burnside Bridge after the battle. In addition to photographs such as the first one here, the bridge has also featured prominently in numerous paintings of the battle, and even on the reverse of a commemorative coin issues by the U.S. Mint in 1937.

This bridge had been built in 1836 to connect Sharpsburg and the nearby town of Rohrersville. Prior to the battle it was generally known as the Lower Bridge, and it crossed Antietam Creek about a mile to the southeast of the center of Sharpsburg. It was constructed of local limestone, with three arches that spanned the creek.

This previously obscure rural bridge became famous for the events of September 17, 1862, when the Confederate Army of Northern Virginia under Robert E. Lee clashed with the Union Army of the Potomac under George B. McClellan. It was part of Lee’s first large-scale offensive campaign, when he invaded western Maryland as part of an effort to weaken northern morale. Upon reaching Sharpsburg, he set up a defensive position line near the town, and his right flank was positioned here in the vicinity of the Lower Bridge, on the high ground on the opposite side of the bridge in these photos.

Despite having a significantly larger army than Lee, McClellan believed that the opposite was true, and he exercised extreme caution in his attack. He did little to coordinate the movements of his different corps commanders, so it resulted in a piecemeal assault that negated the Union’s significant strength in numbers. The fighting began early in the morning, with an attack on the Confederate left flank near the Dunker Church. After this stalled, the battle shifted to a sunken road that became known as the Bloody Lane. There, after hours of fighting, the Union finally dislodged the Confederates from their makeshift trench, but the heavy losses had made the perpetually risk-averse McClellan unwilling to take the initiative and make an aggressive pursuit.

In the meantime, the southernmost part of the Union line was the IX Corps, under the command of General Ambrose Burnside. He was positioned a little to the east of the Lower Bridge, across the river from the right flank of the Confederates. This portion of the Confederate army was potentially vulnerable, with so many men fighting further north against the attacks on the left flank. However, Burnside did not receive orders from McClellan until around 10:00 a.m. Burnside then used a portion of his corps to find a river crossing downstream to outflank the Confederates, while also making several ineffective charges at the bridge itself.

Despite having a significant numerical advantage, with over 4,000 Union soldiers compared to just 500 Confederate defenders, the Confederates held off Burnside’s corps throughout the morning and into the early afternoon. In the process, the Confederates suffered about 120 casualties, while also inflicting about 500 Union casualties before Burnside finally took the bridge around 1:00 p.m. But, it would take another two hours for Burnside to move his men across the bridge and prepare for a final attack on the Confederate line.

The many delays throughout the battle, combined with McClellan’s ineffective coordination of his generals’ movements, prevented what could have otherwise been a decisive blow against Lee’s army. There were also many who questioned Burnside’s decision to waste time trying to take the bridge, rather than simply having his men wade across the relatively shallow creek. Ultimately, these delays meant that Burnside’s attack on the Confederate flank was countered by the arrival of A. P. Hill at 3:30 with fresh Confederate reinforcements. The final portion of the battle was fought between Hill and Burnside on the hill beyond the bridge, eventually drawing to an inconclusive end around 5:30 p.m.

That evening, Lee withdrew his army and made his way back to Virginia. In abandoning his invasion, it made the Battle of Antietam a strategic victory for the Union, although McClellan had missed the opportunity to make it one of the greatest Union triumphs of the war. He also failed to pursue Lee’s fleeing army, and this decision, combined with his ineffectiveness at Antietam, ultimately led President Lincoln to dismiss him as commander of the Army of the Potomac in early November. And, despite the questionable decisions that Ambrose Burnside had made here at this bridge, Lincoln picked him to replace McClellan. Burnside’s time as commander would prove to be short lived, though, because he was in turn dismissed after his own debacle at the Battle of Fredericksburg in December.

The first photo here in this post was taken only days after the battle. The photographer, Alexander Gardner, arrived at the battlefield on September 19, and he spent the next few days documenting the carnage here. He took a number of photographs of the bridge, which had survived the battle relatively unscathed despite being at the epicenter of intense fighting for several hours. In fact, at first glance the photo does not seem to give the immediate impression that a major battle had just been fought there.

However, on closer inspection, the photo offers clues about what happened here. On the bridge itself, many of the wooden boards are missing from the tops of the walls on either side of the walkway. While some of these may have been damaged in the battle, many of them were removed after the battle and repurposed as makeshift grave markers. In the foreground of the first photo, running along the stone wall to the right of the bridge, is a row of temporary graves, each of which is marked by a board from the bridge. These graves had likely been freshly dug shortly before the photo was taken, and many of the graves are topped by large mounds of dirt.

Following the battle, the bridge reverted to its original use, and this continued well into the 20th century and into the age of automobiles. It finally closed to vehicular traffic in 1966, when a bypass was constructed. More recently, the bridge underwent a major restoration after a portion of one of the walls collapsed into the creek. This project involved resetting the stones and repointing the masonry, and the work was completed in the spring of 2017.

Today, the bridge is part of the Antietam National Battlefield, which is run by the National Park Service. It is one of the best-preserved Civil War battlefields, and the quiet riverbanks here at the Burnside Bridge are a must-see for any visitors. The graves from the first photo have since been relocated, but otherwise this scene looks largely the same as in the first photo, aside from additions such as monuments to the regiments who fought here. Among these is a small monument in the foreground to the 51st Pennsylvania Volunteer Infantry, which was one of the units responsible for taking the bridge. However, perhaps the most remarkable feature in the present-day scene is the large sycamore tree that towers over the bridge in the center of the photo. This is the same tree that was growing next to the bridge during the battle, as shown in the first photo, and it stands as the most famous “witness tree” here on the Antietam battlefield.